How to Tie Paper Bag Pants
Whether you’re looking for a creative way to upcycle some old clothes or you’re simply in need of a last-minute Halloween costume, paper bag pants are a fun and easy DIY project. With just a few supplies and a little bit of time, you can transform an ordinary pair of pants into something unique and eye-catching. Here’s how to do it:
You will need:
-A pair of pants (preferably with a straight leg)
-2 paper bags (lunch size or larger)
-Scissors
-Tape or stapler
- Cut two rectangles out of paper, each measuring 18” x 22”
- Fold each rectangle in half lengthwise, and then fold the top and bottom edges inward to meet at the center crease
- Place one rectangle on top of the other, aligning the side and bottom edges
- Starting at the bottom edge, use a stapler to attach the two layers together along the side and bottom seams
- Be sure to leave an opening at the waistline so that you can later insert a drawstring or elastic waistband
- To create the legs of your pants, make two vertical cuts up each pant leg, stopping about 3” from the top edge
- Then make two more cuts horizontally across each leg, creating four “flaps” total per pant leg
- Fold in each flap so that it is flush with the inner seam of the pant leg, and then staple them in place
- This will create sort of a “gusset” effect that will allow your pants to better fit over wider hips or thighs
Credit: www.fountainof30.com
How Do You Tie Sash Pants?
How to Tie Sash Pants
Sash pants have been around for centuries and were originally worn by men. Today, they are popular among both genders and all ages.
They are comfortable, stylish, and can be dressed up or down. While sash pants are typically easy to wear, tying the sash can be a bit tricky. Here is a step-by-step guide on how to tie sash pants:
1. Start by putting on your pants. Make sure the waistband is not too tight or too loose. If the waistband is too loose, the sash will not stay in place.
If the waistband is too tight, it will be uncomfortable to wear.
2. Take one end of the sash and thread it through the loop on the other end. Pull until the sash is tight against your waist.
3. Cross the sash in front of your body and tie it in a knot behind your back. You can also make a bow if you prefer that look.
4 .
Once you have tied the knot or bow, tuck in any excess fabric so that it is not hanging loose. And that’s it! You’re now ready to rock your new sash pants!
How Do You Tie a Ribbon Belt?
Tying a ribbon belt is a simple process that can be done in just a few steps. The first step is to take the ribbon and fold it in half. Then, take the two ends of the ribbon and thread them through the loop at the end of the belt.
Next, pull the ribbon tight so that the knot is secure. Finally, trim any excess ribbon from the ends.
How Do You Tie Cute Shorts?
Tying shorts can be a bit tricky, but with a few tips and tricks, you can definitely rock the look! Here are a few ways to tie your shorts:
1. The Side Tie: This is probably the most popular way to tie shorts.
To do this, simply take one side of your shorts and tie it with the other side. You can make it as tight or loose as you want – just make sure that it’s not too loose or else your shorts will fall down!
2. The Front Tie: This method is similar to the side tie, but instead of tying the sides together, you’ll be tying them in the front.
Again, make sure that the knot is not too loose or else your shorts will fall down!
3. The Back Tie: For this method, simply take both sides of your shorts and tie them together at the back. This is a great option if you want to show off your backside!
4. The High-Waisted Tie: If you have high-waisted shorts, then this is the perfect way to show them off! To do this, simply take both sides of your shorts and tie them together at the waistband. You can make it as tight or loose as you want – just make sure that it’s not too loose or else your shorts will fall down!
How Do You Tie a Jumpsuit Belt?
When it comes to tying a jumpsuit belt, there are a couple different ways that you can go about doing so. The first way is to simply take the belt and thread it through the loops on the jumpsuit. Once you have done this, you can then tie the belt in a knot or bow at the front of the jumpsuit.
Another way to tie a jumpsuit belt is to first put on the jumpsuit and then wrap the belt around your waist. Once you have done this, you can then either tie the belt in a knot or bow at the front of the jumpsuit. Whichever way you choose to tie your jumpsuit belt, just make sure that it is tight enough so that it will stay in place but not so tight that it is uncomfortable to wear.
ARITZIA TIE-FRONT PANT 🎀 | Aritzia outfits & How to tie a bow on pants (2 ways)
How to Tie a Bow on a Dress Belt
If you’re looking to add a little extra something to your outfit, why not try tying a bow on your dress belt? It’s a simple way to make a statement and it can be done in just a few easy steps. Here’s how:
1. Start by threading the belt through your pants loops and fastening it at your waist.
2. Take one end of the belt and make a loop, passing it over the other end of the belt.
3. Cross the ends of the belt and tuck one end underneath the other.
4. Pull both ends of the belt tight and tie them together in a knot.
5. Finally, adjust the bow to your liking and enjoy!
How to Tie a Side Bow on a Dress
If you’re looking to add a little something extra to your dress, why not try tying a side bow? It’s a simple and elegant way to give your look a little bit of extra flair. Here’s how to do it:
1. Start by finding the center front of your dress. Then, measure out about 2 inches to the side (this will be where you start tying the bow).
2. Make a small loop with the fabric at this spot, and then bring the ends around to form a second loop.
Cross the ends in the middle, and then tuck them underneath the first loop.
3. Pull on both loops until they’re tight against each other. Then, take one end and make another small loop (this time without crossing it in the middle).
Tuck this loop underneath the first two loops and pull it through.
4. Finally, just adjust everything so that it looks even and you’re done! A perfectly tied side bow on your dress!
How to Tie a Perfect Bow on Clothes
Most people don’t know how to tie a bow on clothes. Here are easy instructions for the perfect bow every time:
First, make sure the fabric you’re working with is not too thick or stiff.
You want to be able to manipulate the material easily.
Next, find the center of the fabric and fold it in half. Then take the two loose ends and cross them over each other in the middle.
Now take the top end and bring it around behind the crossover point, then pull it through the hole created in front. snug it up against the fabric so there’s no gap between the knot andthe rest ofthe cloth.
You’ve now created a loop with one end inside ofit.
Take hold ofthe other end and pull it through that loop-now you have two loops!
To finish, justpull both loops tight simultaneously, adjust if needed,and voila-you’ve tied a beautiful bow!
How to Tie a Bow on a Shirt
Are you looking to add a little extra something to your shirt? Tying a bow is the perfect way to do so! Here’s how you can tie a bow on a shirt:
First, find the center of your shirt. Then, fold each side of the shirt in towards the center. Once you’ve done that, take each end of the folded fabric and tie it together in a knot.
Finally, fluff out the loops and adjust the bow as needed.
And there you have it! A simple way to add some flair to your shirt.
Be sure to experiment with different types of fabric and knots until you find a look that you love.
How to Tie a Half Bow
When it comes to tying a half bow, there are two different ways that you can go about doing it. The first way is by using a regular knot, and the second way is by using a loop knot. If you’re not sure which method to use, then we suggest trying out both ways and seeing which one works best for you.
For the regular knot method, start by threading your ribbon or string through the middle of your bow. Then, make a small loop with the ribbon and pull it tight. Next, take the ends of the ribbon and tie them together in a basic knot.
Once you’ve done this, adjust the loops until they’re even and your half bow is complete!
If you want to try the loop knot method, start by making a small loop with your ribbon or string. Next, thread the end of the ribbon through this loop and pull it tight.
Now take the other end of the ribbon and make another small loop. Thread this end through the first loop and pull it tight. You should now have two loops – one on each side of your half bow.
To finish things off, just tie each end of the ribbon in a basic knot.
How to Tie Paperbag Pants Knot
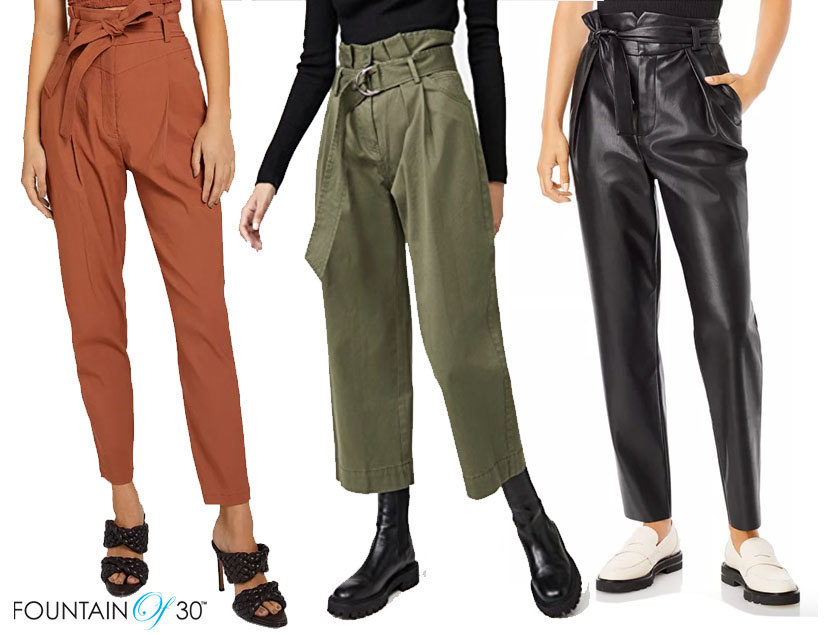
Paperbag pants are a type of pants that have an elastic waist and wide-leg silhouette. They are usually made from a lightweight fabric and can be styled in many different ways. One of the most popular ways to wear paperbag pants is with a knot at the front.
This style of pant looks great with both casual and dressy tops. Here is a step-by-step guide on how to tie paperbag pants knot:
1. Start by putting on your paperbag pants.
Make sure that the waistband is sitting at your natural waistline.
2. Take the fabric of one leg and gather it up in your hand so that it forms a “paper bag” shape.
3. Tie a knot at the top of the gathered fabric, close to your body.
You can make this knot as tight or loose as you like – just make sure that it’s secure enough to hold everything in place!
4. Repeat steps 2 and 3 with the other leg of your paperbag pants.
5. Once both knots are tied, adjust the placement of each one until you’re happy with how they look.
You can also play around with how tight or loose you make each knot – experiment until you find what looks best on you!
How to Tie Pants With a Loop String
If you’ve ever wondered how to tie pants with a loop string, wonder no more! It’s actually quite simple. Just follow these easy steps and you’ll be able to do it in no time.
First, take the end of the string and thread it through the loop. Then, pull the string tight so that the knot is secure. Next, take the other end of the string and wrap it around your waist.
Once it’s wrapped tightly, tuck it under the first part of the string andpull it through. Finally, tighten the knot and you’re all done!
With this method, you’ll never have to worry about your pants falling down again!
Conclusion
Paper bag pants are a style of pants that have been around for centuries. They are named after the paper bags that they resemble, and they are usually made from a lightweight fabric such as cotton or linen. Paper bag pants are typically worn in warm weather and can be dressed up or down depending on the occasion.
To tie paper bag pants, start by folding the waistband over so that the front and back panels meet in the middle. Then, take each side of the waistband and tie it in a knot at the center front. Finally, adjust the knots so that they are tight enough to hold the pants up but not so tight that they are uncomfortable.