How to Draw Bag
Bag drawing is not as difficult as it may seem. In fact, once you get the hang of it, it can be quite fun! There are a few things you will need to keep in mind when drawing a bag, such as proportion andPerspective.
With these simple tips, you will be able to draw a realistic-looking bag in no time.
- Begin by drawing a rectangle for the bag’s main body
- This can be any size or shape you like
- Next, add two handles to the top of the rectangle using curved lines
- Draw a zipper across the top of the bag, starting and ending at the handles
- Add any other details you like, such as buttons or pockets
- Erase any unwanted lines and color in your drawing to finish it off!
Credit: www.youtube.com
How Can We Draw a School Bag?
Assuming you would like tips on drawing a school backpack:
When it comes to drawing a backpack there are many different ways that you can go about it. You could make it super simple and just draw a rectangle with straps coming off of the sides or you could get more detailed and add in all of the compartments and zippers.
It really depends on what level of detail you want in your drawing.
If you want to keep it simple, start by drawing a rectangle for the main body of the backpack. Then, add two lines coming down from the top corners for the straps.
To make the straps look more realistic, curve them inward slightly where they connect to the bag. Finally, add a small rectangle at the bottom for the base of the bag. That’s all there is to it!
Now, if you want to get more detailed with your backpack drawing, start by adding in all of the compartments and zippers. Start with a large rectangle for the main body of the bag and then add smaller rectangles inside for each of the compartments. Add vertical lines across these rectangles to indicate where each zipper will go.
Finally, don’t forget to add in straps! Just like before, start with two straight lines coming down from the top corners but this time make them thicker so they look like they can support some weight.
There you have it!
Two different ways that you can draw a backpack depending on how much detail you want in your final product. So grab some paper and pencils and give it a try yourself!
How Do You Make a Draw Bag?
Assuming you would like a tutorial on how to make a drawstring bag:
You will need:
-1/2 yard of cotton fabric (quilting cotton or something similar)
-Matching thread
-Scissors
-Pins
-Ruler or measuring tape
-Chalk or fabric marker
-Sewing machine
Instructions:
1. Cut your fabric. You will need two rectangles that are 14″ wide and 22″ long.
Fold the top edge of each rectangle down 1/4″, and press with an iron. Then fold it down again 1″, and press again. Sew along the bottom of this folded edge with a straight stitch, about 1/8″ from the edge of the fabric. Repeat for both pieces of fabric.
2. Make the casing for the drawstring by sewing a straight line 1″ from the top raw edge of each piece of fabric, leaving a 3″ opening in the center so you can thread your drawstring through later. Backstitch at each end to reinforce.
3. Pin the two pieces of fabric right sides together, matching up all four corners and sides.
Sew around all four sides with a 1/2″ seam allowance, leaving a 3″ turning hole in one side so you can turn your bag right side out later. Be sure to backstitch at each corner for extra reinforcement!
4. Trim away any excess thread, then clip off all four corners close to the stitching (but be careful not to cut into your stitches!). This will help your bag corners lay nice and flat when you turn it right side out later on.
5. Turn your bag right side out through the turning hole you left earlier, then poke out all four corners with a chopstick or other sharp object so they’re nice and sharp too. Press flat with an iron if desired, then use chalk or a fabric marker to mark where you’ll sew your gathered top closed later on – about 5″ down from the top raw edge should do it!
6A (OPTIONAL). If you want nicely sewn hems on either end of your drawstrings instead of just frayed edges, stop here and sew a small zigzag stitch along both raw edges of each string before continuing on to step 6B below! Otherwise, skip ahead…
How Do You Draw a Travel Bag?
Assuming you would like tips on how to sketch a travel bag:
When drawing a travel bag, start by sketching a rectangle. This will be the base of the bag.
Then, add two smaller rectangles on either side of the first rectangle for the handles. Add a curved line across the top of the rectangle to indicate where the bag opens. Finally, add any details you desire, such as a zipper or pockets.
How Do You Draw a Cute Little Bag?
Assuming you would like a step by step guide on how to draw a bag:
Step 1: Sketch a rectangular shape for the bag’s body. This will be the foundation of your drawing, so make sure that your lines are light and easy to erase.
Step 2: Next, sketch two curved lines at the top of the rectangle. These will be the handles of your bag.
Step 3: To add some dimension to your drawing, give your bag some volume by drawing two vertical lines down the middle of the rectangle.
Make sure that these lines are slightly curved inward.
Step 4: Now it’s time to start fleshing out your drawing! Draw a horizontal line across the bottom of the rectangle to create a flat surface for your bag to rest on.
Then, draw in some diagonal lines on either side of this horizontal line to indicate folds in the fabric.
Step 5: To finish up your drawing, add any final details that you want, such as a zipper or buttons. Erase any remaining pencil marks and you’re done!
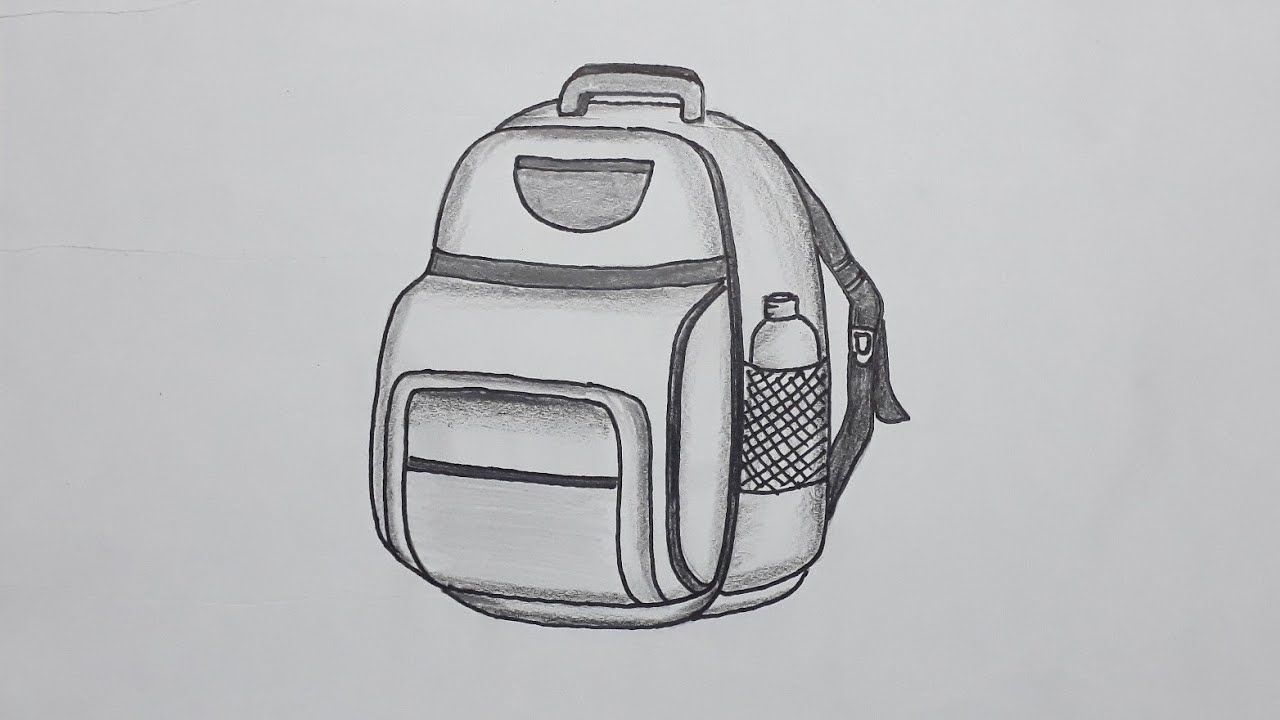
HOW TO DRAW A BACKPACK
Table Drawing
Tables are one of the most versatile tools in a draftsman’s toolkit. A table allows you to create a drawing that is both accurate and visually appealing. In this article, we will show you how to draw a table using three different methods: tracing, freehand, and using a ruler.
Tracing is the quickest and easiest way to draw a table. Simply place your paper over the top of the object you wish to trace and use a pencil or pen to trace around the outline of the object. Once you have traced the outline of the object, remove your paper and connect the dots to complete your drawing.
Freehand drawing is a bit more challenging than tracing, but it gives you more freedom to be creative with your drawing. To draw a table freehand, start by sketching out the rough shape of the table. Then, add in details such as legs, chairs, and any other features you wish to include.
When you are finished adding details, use a pencil or pen to go over your final drawing.
If you want to ensure that your drawing is perfectly symmetrical, then using a ruler is the best method for you. To draw a table using a ruler, start by finding the center point of your paper.
Then, draw two lines perpendicular to each other at this center point; these will be your x-axis and y-axis lines. Next, find the midpoint of each line and mark these points with small dots. Starting at one dot, use your ruler to connect this dot to all four quadrants created by the intersecting lines; this will create your tabletop rectangle .
Plastic Bag Drawing
A plastic bag, or polybag, is a type of container made of thin, flexible, plastic film. They are used for packaging various products, such as food, cosmetics, chemicals and waste. Plastic bags are usually made from high-density polyethylene (HDPE) or low-density polyethylene (LDPE).
HDPE bags are more rigid and less likely to tear than LDPE bags.
Plastic bags can be printed with logos and other designs using rotogravure printing or flexography. Most plastic bags have gusseted sides so they can expand to hold larger items.
Some have handles so they can be carried easily. Some have zippers so they can be sealed shut.
Plastic bags are used in many different ways.
Grocery stores use them to package meat, produce and other items. Retailers use them to package clothing and other merchandise. Manufacturers use them to package parts and components.
And consumers use them to carry everything from lunch to laundry!
Despite their ubiquity, plastic bags have come under fire in recent years for their impact on the environment. It’s estimated that Americans alone throw away 100 billion plastic shopping bags each year – which means we’re sending millions of tons of waste to landfills!
Worse yet, many of these bags end up as litter in our oceans and waterways where they endanger marine life.
So what’s the solution? Many cities and countries around the world have implemented bans or taxes on plastic shopping bags in an effort to reduce waste and protect the environment.
If you’re looking to reduce your own reliance on disposable plasticbags, there are plenty of options available: reusable shopping totes; cloth produce bags; even reusable zipper storage bags for sandwiches and snacks!
How to Draw a School
Assuming you would like a blog post on tips for drawing a school:
When beginning to draw a school, start with the outline of the building. Draw the roof first, then the walls.
Once the basic structure is in place, add in any smaller details such as windows and doors. To make your school drawing look more realistic, be sure to add shading and shadows. Start by lightly sketching in the shadows with a pencil, then go over them with a dark pen or marker.
Finally, erase any unwanted lines or smudges for a clean finish.
With these steps in mind, anyone can create a beautiful and realistic rendition of a school building! Just remember to take your time and have fun with it.
Open Backpack Drawing Easy
Assuming you would like a backpack drawing tutorial:
First, draw a rectangle that will be the back of the backpack. This should be large enough to fit whatever you want inside of it.
Next, draw straps coming down from the top corners of the rectangle. Make sure these are even with each other. Now, on the bottom of the rectangle, draw two curved lines meeting in a point to create an opening for the bag.
To finish your backpack drawing, add details like a zipper, pockets, or decorations. Color it in and you’re all done!
Conclusion
This blog post covers the basics of how to draw a bag. The first step is to sketch out the basic shape of the bag. Next, add in the details like the handles and straps.
Finally, color in your drawing and add any final touches.